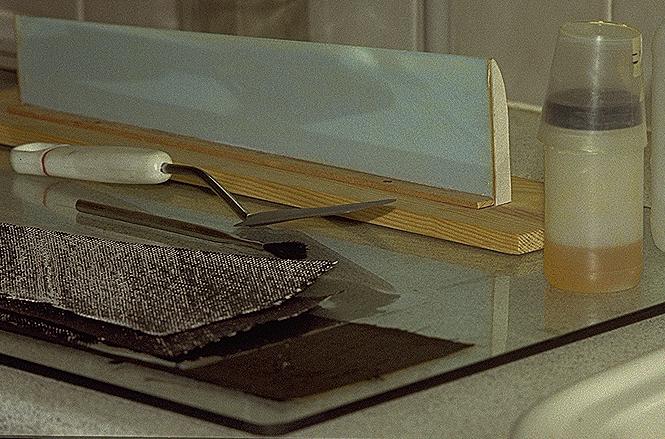
Mix the laminating epoxy well using the stippling brush. I use the small foil baking dishes that supermarkets sell for individual pies. From this point you must keep going as its essential that the layup is completed and in the vacuum bag well before the epoxy starts to go off. It takes me about 75 minutes from starting to cut the carbon until the assembly is under vacuum and curing. The SP 113 laminating epoxy I use remains workable for 30-40 minutes from the time its mixed.
Now put a sheet of release film, cut about 20 mm bigger all round than the carbon, on the glass. This is the inside of the D-box. Lay the first piece of carbon on it and wet it out with epoxy smeared on with the spatula.
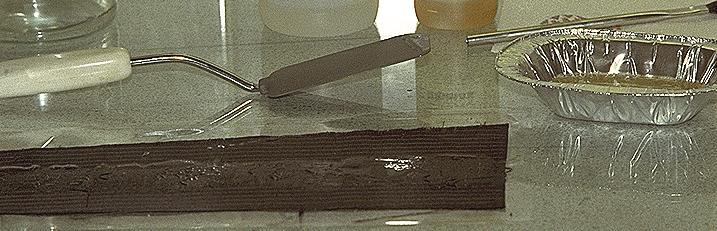
If you are using unidirectional fabric this should be on the inside, i.e. the first layer to be put down. Blot and roll it with the kitchen towel and rolling pin until the paper comes off dry.

Roll hard but don't skid the rolling pin or you will move and distort the cloth. Add the next layer of cloth and repeat the wetting and blotting process until all the layers are in place. At this point the layup is almost complete. Allard van Wallene recommends putting more paper towel on the completed layup, covering it with vacuum bagging film and sucking it down for 5 minutes. This gets lots more epoxy out. Repeat until the paper remains dry.
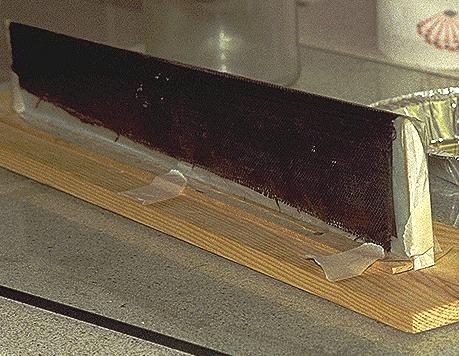
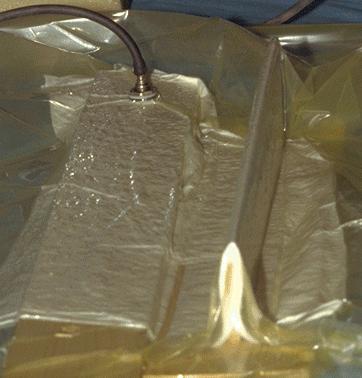
The assembly will now be covered with stiff mylar sheet, which helps to give a smooth, untextured surface to the outside of the D-box, and with breather felt. The felt is an open weave, resilient material that has two functions; it provides a path that allows air to be sucked out of the bag without getting trapped in bubbles and it assists in distributing atmospheric pressure evenly onto the carbon.
The carbon layup is covered in turn with 0.4 mm (0.014") Mylar sheet and breather felt. The mylar is important as it controls the quality of the outer surface. Make sure there are no wrinkles in the outer release film as or you will get them imprinted on the D-box for all to see! The whole assembly is placed in the vacuum bag, making sure that the breather felt provides a continuous vacuum path from the connection point to and all over the Mylar sheet and mould.
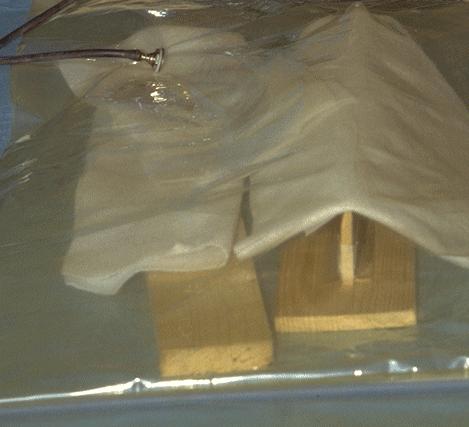
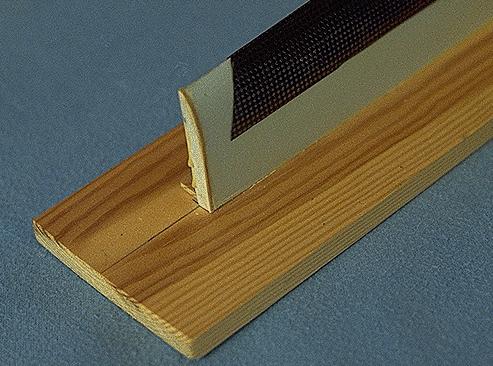
The bag is now sealed and vacuum is pulled. Pull the bag down slowly so that you have time to smooth the Mylar and breathing felt into place and to make sure that the bag fits right down over the mould. If you skimp on this step you may get bagging under the leading edge where there was insufficient pressure on the carbon to compact it onto the mould. This is only a problem at sharp curvatures and the sharpest is under the leading edge.
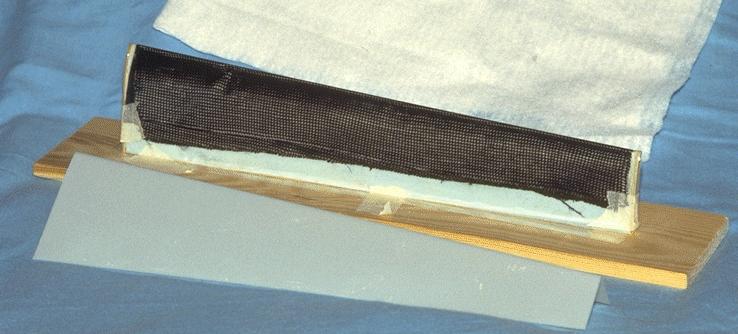
Leave the vacuum on for 24 hours. Then release the vacuum and remove the D-box from its mould.
Strip the release film off the inside and outside surfaces. Roughly trim the D-box to shape with heavy scissors. If you did a good job wetting the cloth with epoxy the result should be a glass-like finish on the outside. Who said you got all that epoxy out? If the epoxy was less well spread you may find rough patches where there is less epoxy. As long as the cloth doesn't look too dry and the area isn't more than a sq. cm or so the D-box should still be usable. You can tip in cyano or add a little epoxy if you're really keen. In any case you'll probably only see this on your first few attempts.
Handle the D-box with care at this stage as the epoxy is still 'green' and can be deformed fairly easily. Pop it back on the mould for at least 24 hours to finish curing.
I find that I can comfortably make the four D-boxes needed for a wing in four evenings using a single vacuum bag. If your vacuum setup has a T-junction you can prepare and suck down another D-box alongside the first. Just remember to close off the first bag's vacuum line with a clip while you suck down the second bag. Once both are sucked down you can take the clip off.